Note- This software is only compatible with Windows 7 & below. Apple Mac is NOT supported.
Step 1. Ensure Windows Fax Service is installed
- Check this is installed via the Control Panel.
- There are a few different ways to open the Control Panel, depending on how your PC is configured.
- The most common method is by clicking the Start menu, then Control Panel.
- Then go to “Programs and Features”.
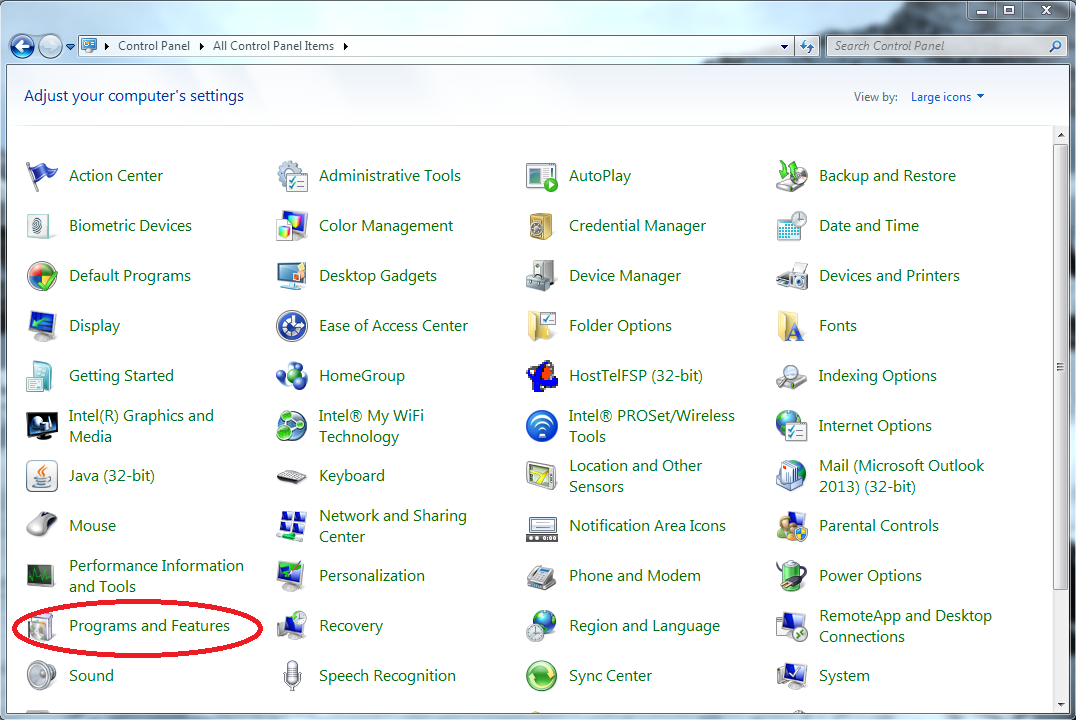
- Once you’re in the “Programs and Features” window
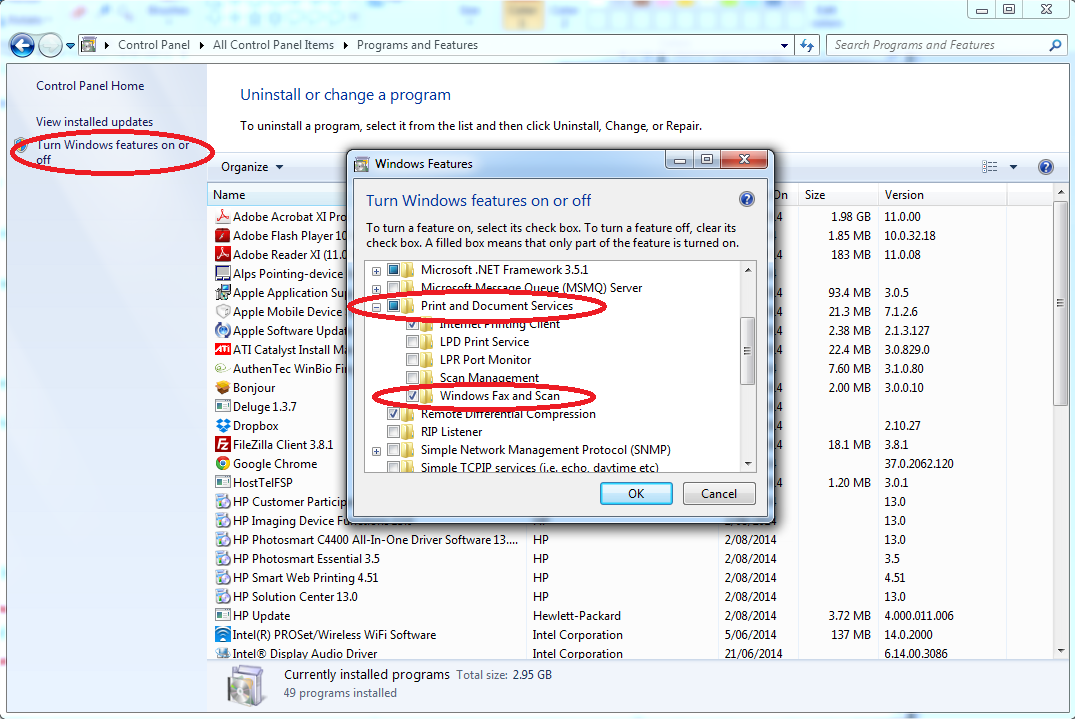
- Expand the “Print and Document Services” section.
- Verify there is a tick [√] in the box next to “Windows Fax and Scan”.
- If it is ticked, click the “Cancel” button then continue on to Step 2 below.
- Otherwise, please tick the box next to “Windows Fax and Scan”, then choose “Next” and follow the prompts.
- You will need your original Windows® installation CD to continue, since we are installing original Microsoft® Windows® software.
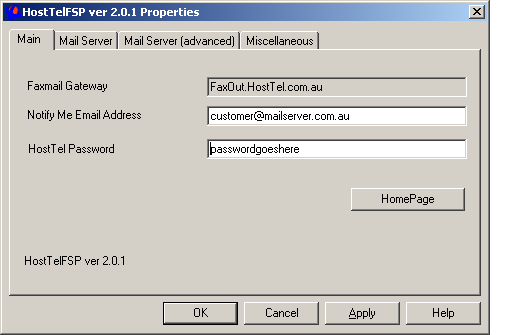
Step 2. Download & Install the FaxOut software
- Download the Fax Software from the below link
- Follow the prompts to install the software
- When you get to the below screen, enter the login details provided to you.
Step 3. Sending a Fax
- From any application, select ‘Print’ as if you were printing a document
- Select the “FAX” printer
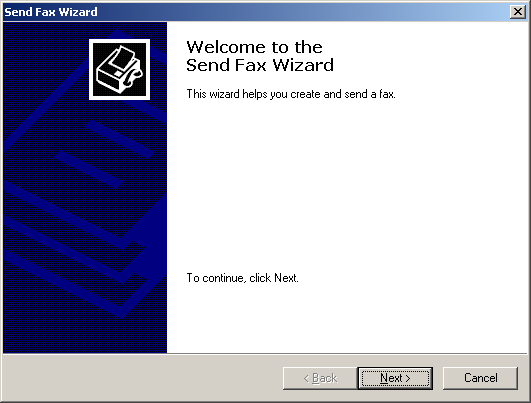
- Click ‘Next’
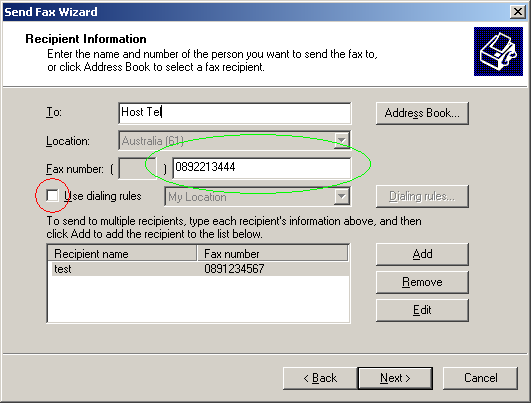
- Ensure the “Use dialing rules” option is NOT selected
- Enter the recipient’s name in the “To” section
- Enter the destination fax number (including area code) in the large white box next to “Fax Number:” (circled in green)
- Then click “Next” on the next few pages, followed by “Finish” on the last page.
- Presto! Your fax has been sent
- You will receive an email confirmation on success or failure.